Hi Everyone,
Would like to share
the knowledge how to achieve the ROW_NUMBER () Functionality through SSIS.
For this, we shall
consider an example.
The business logic that needed to be followed was that I had to assign
a “Twin Code” to each record. This meant that for each family in the database,
if two or more members were born on the same day they should be treated as
twins. The twins should be assigned a Code enumerating them in order of birth.
This can be achieved
through SQL by just writing a simple ROW_NUMBER () function.
To achieve this same
in SSIS, We shall in need of Data Flow task.
Connect an OLEDB
Source to the Family table.
Now, use a Sort
transformation which is likely to be used as ORDER BY Statement in our
ROW_NUMBER () Function.
We are going to sort
by FamilyID and DateOfBirth Column.
Now pull out a Script
Component. Because we need to “Partition By” Family ID and DateOfBirth, We
shall include those as an Input in our Script component and we shall call
partition it.
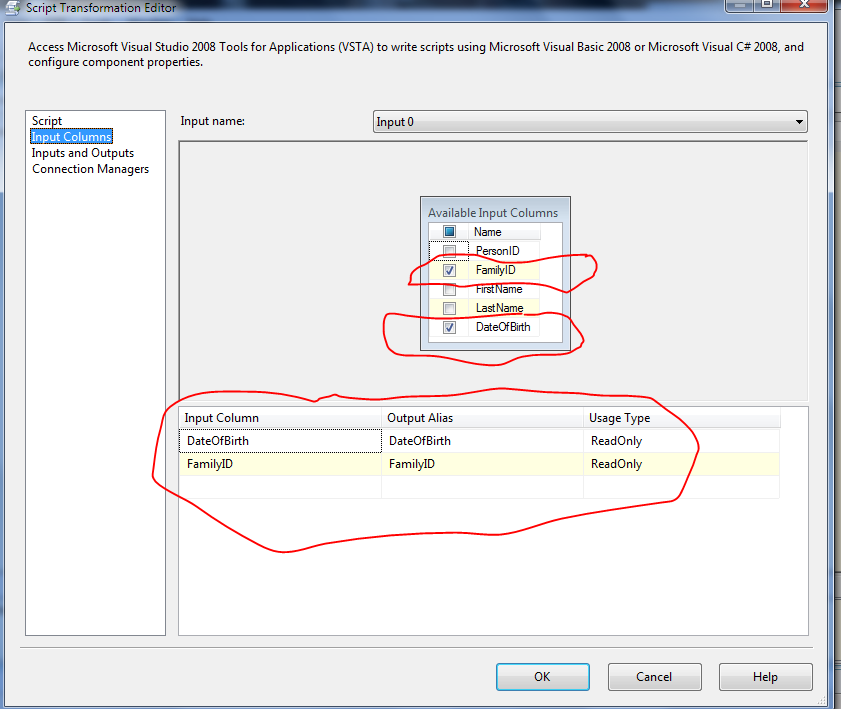
To add the inputs, go to Inputs Columns option on Script task and Add two columns DateOfBirth
and FamilyID Columns.
Now to create one more column which represents holds
the Row_Number() values, I am creating a Row_Rank on Inputs and Outputs output.
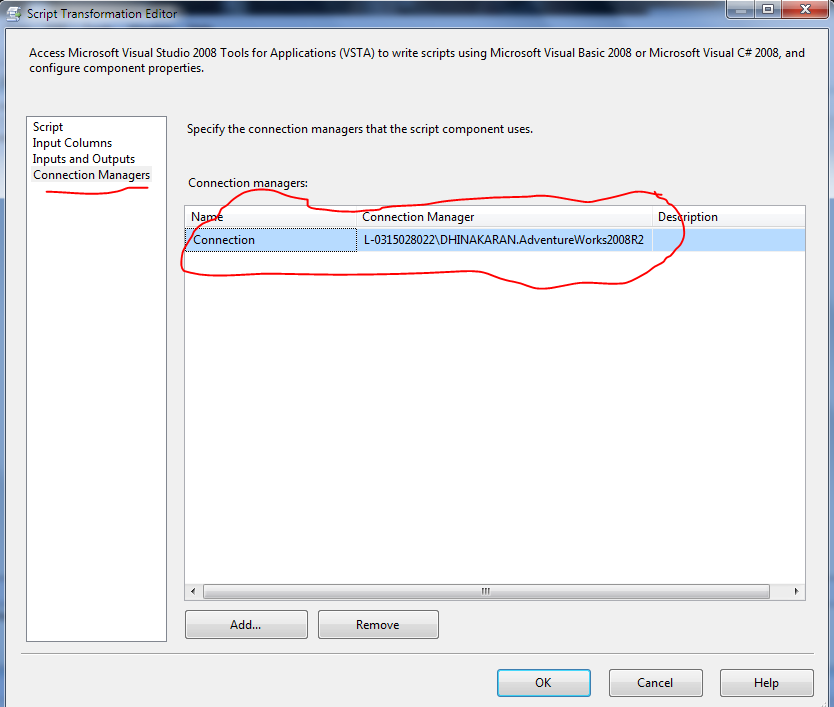
Add the connection for Script component using Connection manager Options in Script
Task.
Now add the following code and give ok to generate a
Row_Number().
|
/* Microsoft SQL Server Integration Services
Script Component
* Write
scripts using Microsoft Visual C# 2008.
*
ScriptMain is the entry point class of the script.*/
using System;
using System.Data;
using
Microsoft.SqlServer.Dts.Pipeline.Wrapper;
using
Microsoft.SqlServer.Dts.Runtime.Wrapper;
[Microsoft.SqlServer.Dts.Pipeline.SSISScriptComponentEntryPointAttribute]
public class ScriptMain : UserComponent
{
DateTime Category;
int row_rank = 1;
/*Variable: Category::: Declare a string On
class level which can be accessed anywhere inside the class. This variable is
used Compare the dataofbirth presence */
/*Variable: row_rank:: The initial value of
Rank is set to 1 for every record
*/
public override void PreExecute()
{
base.PreExecute();
/*
Add your code here for preprocessing or remove if not needed
*/
}
public override void PostExecute()
{
base.PostExecute();
/*
Add your code here for postprocessing or remove if not needed
You can set read/write variables here, for example:
Variables.MyIntVar = 100
*/
}
public override void Input0_ProcessInputRow(Input0Buffer Row)
{
if (Row.DateOfBirth.Date != Category)
{
row_rank
= 1;
Row.RowRank = row_rank; //Row_Rank
Category
= Row.DateOfBirth.Date;
}
else
{
row_rank++;
Row.RowRank = row_rank;
}
/* We are validating whether the value is present in Row.
If yes, then we are incrementing the Rank else, Swap the ranks, assign new
value for rank starting from 1 and store the DateOfBirth value in Category
variable for next run.
*/
}
}
|


This comment has been removed by the author.
ReplyDeleteNice information. Thanks for sharing content and such nice information for me. I hope you will share some more content about. Please keep sharing!
ReplyDeletebig data training in chennai
This comment has been removed by the author.
ReplyDeleteThanks for the informative Post. I must suggest your readers to Visit Big data course in coimbatore
ReplyDelete